Monday, October 31, 2011

CAS-ual Fridays CFC26

This weeks challenge over at CAS-ual Fridays is to create a clean and simple card using the sketch that is pictured below.
This is my take on the sketch. I took the Dearly embossing folder (from the Dearly & Frost set Sizzix 657060) and inked up the non-raised portion of the folder with soft pool ink and ran it through my cuttlebug machine. Then I stamped the sentiment onto a tag with clear versa mark ink and embossed with white embossing powder. After the panel was assembled, I attached it to a 4.25" x 5.5" white card base. The sentiment comes from Stampin Up Merry & Type 122550.

Thanks for stopping by and I appreciate the comments.


Sunday, October 30, 2011

Penny Black Sketch Challenge

This weeks challenge at Penny Black is to create a card using this sketch below. I tried to get this card made all week, but didn't get around to making my card until this afternoon. This is my take on the sketch. The flower panel comes from Sizzix's Dots & Flowers Set (655838). I inked the embossing folder with Hero Arts soft green and ran it through my cuttlebug machine. Then I punched out four panels from Stampin Up's postage stamp punch and stamped the images onto each stamp punch panel. To finish off my card, I added a sentiment banner and placed the ribbon between the small square panels.


The stamps used are Penny Black: Flowers & Wishes 30-047, to you 30-067 (leaves), and Flower Gallery 30-031. Thanks for stopping by and I appreciate the comments. Hope that everybody's weekend was great.


Thursday, October 27, 2011

Christmas Cards & Ornaments

These are the last of my cards for this months Hero Arts Challenge. I had these cards and ornaments finished for a few days and totally forgot to get these posted. This first card is an inspiration from Kristina Werner. To see her card, please go here. I stamped the sentiment (Happy Wishes CL255 [discontinued]) onto the card base with clear versa mark ink and then embossed with white embossing powder. Then I stamped the Music Background stamp CG222 with clear versa mark ink. I added a border and then some red ribbon and trees for the finishing touches. For this card I followed the second sketch in the challenge but changed it up a little. Stamps used are: Flourish Pine S5247, Holiday Sayings CL343 (sentiment), and Joy Snowman 657781.


For these last two projects I decided that I wanted to make a few Christmas Ornaments and this is what I came up with. This ornament has a front and back side. The back of the ornament has the sentiment "Wishing You a season filled with all special things" comes from Hero Arts Stamp Wish Messages C2877 (Circa 2003). To make the frame of the ornament I cut white cardstock with the Lacy Squares Nestabilities Die and then Cut a smaller square die to create the cutout center. I cut a 3 1/2 x 3 1/2 inch square and stamped the Ornament in clear versa mark ink and embossed it with silver embossing powder. then I mased the ornament and distressed the paper with thumbled glass distress ink and then stamped the flourish background CG119 over the masked image. Then I colored the ornament with sky blue memento marker and went over the colored image and the flourish with Sakura star dust pen. The back of the ornament was done the same way as the front. The frame sits on top of the image with dimensional adhesive and front & back are adhered together.

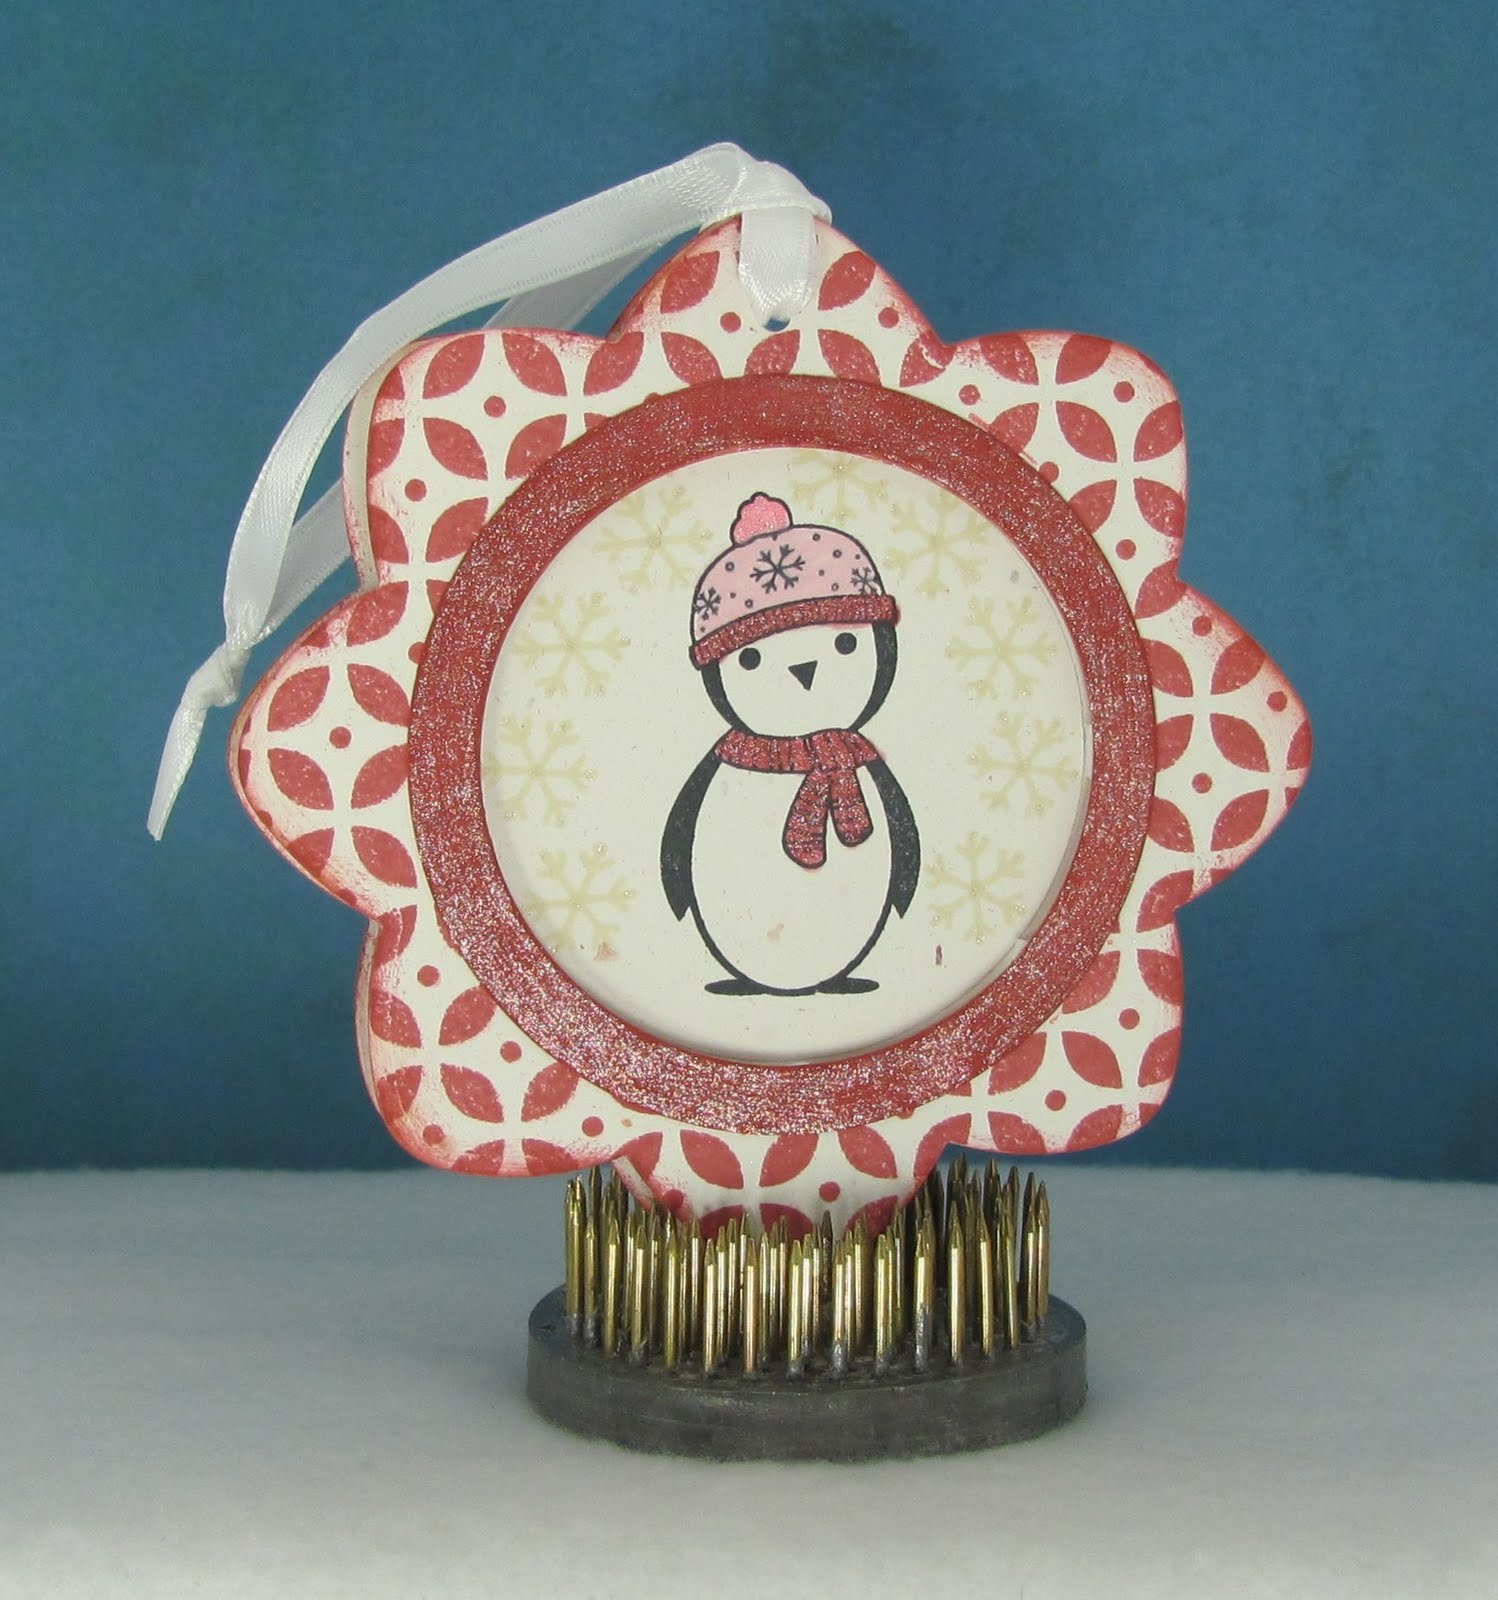
This Ornament is done the same way as the ornament above; only thing different is I used different stamps and a different die. The penguin is from Hero Arts; cap and scarf penguin D5081. The stamped used on the die is Four Leaf Grid S5141. The red circle around the penguin was colored with Rhubarb Stalk memento marker and then I went over it with a clear Sakura star dust pen to give it some sparkle. The front and back of this ornament are the same.


It was fun making these cards and ornaments. The ornaments will be given away to one lucky person who attends my card class that I am teaching tonight.


Thanks for stopping by and I appreciate the comments. Have a wonderful evening.


Tuesday, October 25, 2011

CAS-ual Fridays CFC #25

I haven't posted a card for the CAS-ual Fridays challenge for over a month. I can't believe that it has been that long. This weeks challenge is to "use any medium (markers, pencils, watercolors, blending pens, etc) to add color to your stamped image". Here is my card that I made for the challenge. I stamped the Decorative Tree Stamp (Hero Arts) K5440 unto a 4 1/4" x 5 1/2" white card base and then colored the leaves and ornaments with Faber-Castell PITT artist pens. Then I went over the image with a clear spica pen (made by Copic) to give the tree some glittery shine. The shine is hard to see on camera, but in real life it sparkles. The sentiment is stamped with Hero Arts Traditional Messages LP178. I am also entering this card in the Hero Arts Challenge for this month. Thanks for stopping by and I appreciate the comments.


Monday, October 24, 2011

90 Minute Scramble

Today I participated in a 90-Minute Scramble that was hosted by MyPink Mexico(call me Mary Dawn) (Mary is part of the Hero Arts Flickr group). The challenge was to create a birthday card using Hero Arts stamps and one of this month's sketches. Or we could create a Christmas card using pink--a little or a lot. This is the card that I came up with for the challenge. This was the fastest card that I ever made. I could not believe that it only took me about an hour to make this card. I guess that I need to challenge myself more often. Being part of this challenge showed me that I can make a card within 90 minutes. It was fun making this card.
I cut my paper to 4" x 5 1/4" and covered the paper with forest moss distress ink. Then I sprayed water onto the Flourish Pine stamp S5247 and stamped the image onto the colored paper. To speed up drying, I applied an heat gun to the paper. For the ornament (magic of christmas CL462), I stamped onto white cardstock and embossed with white embossing power and fired brick distress ink was applied to the ornament and then the ornament was cut out. The sentiment (Very Merry Christmas CL543) was embossed and for the finishing touches I added two clear gems. I was very pleased in how my card turned out.

Thanks for stopping by and I do appreciate the comments.

Sunday, October 23, 2011

Christmas Tags

This week I have been busy trying to make Christmas tags.
I stamped the Christmas Pride stamp 40-075 onto my tag with tuxedo black memento ink and then masked it so that I could distress the background with wild Honey ink and then while the mask was still in place, I stamped over it with the Paisly Outline stamp 40-048. Once all that was finished, I colored the flower with a red copic marker and added a few pearls to finish off the tag.

This next tag was stamped with the Adornment 3996J Penny Black Stamp and Let It Snow stamp 30-086. Peeled paint and fired brick distress stains were used for my ink. After, inking the images, I distressed the background with wild honey distress ink. The sentiment was stamped with tuxedo black memento ink. This tag was an inspiration from Jill Foster. To see her tags please go here.

This third tag was stamped with the Jolly Friends stamp set 30-058. First I stamped the stocking onto the tag and then stamped it again onto white cardstock and then colored in with copic markers. When the coloring was complete, I cut out the image and attached it to the tag using dimensional adhesive. The sentiment comes from in a pear tree 30-035 stamp set.


This last tag was simple to make. I stamped the Christmas Note image 4097J onto a cut tag with tuxedo black memento ink and colored the image with copic markers. Then I used fired brick distress ink to ink around the edges of the tag. The sentiment comes from the in a pear tree penny black stamp set 30-035.


The Penny Black blog has a card challenge every week. I had time, so I am entering these tags into the challenge. Here are the directions to enter the challenge:

CARD CHALLENGE Create a *new* Penny Black stamped gift tag and load it into their Gallery by Midnight Sunday night, PST. Be sure to tag your entry with “pennyblackgifttag“. They will choose a random winner to receive a Penny Black prize package. The winner will be announced on Tuesday.
You’ll love all the gift tags we have lined up this week. We hope your week at the Penny Black Blog inspires you to join our Gallery if you haven’t already, and upload YOUR Penny Black artwork!

I am entering these tags into this challenge. Thanks for dropping by and I appreciate the comments. Have a wonderful day!!

Monday, October 17, 2011

Christmas Planner

I will be teaching a card class next week at my church and I wanted something that I could ramdomly give away to one person. I thought that a Christmas Planner was the perfect give away. This is the front of the planner. The main image panel is 5" x 8.5" and it has 4 pages inside that have pockets. For this first part of my project, I stamp the Starry Sky S5448 stamp onto white cardstock with silver ink and embossed with silver embossing powder. Then I distressed the panel with broken china and chipped sapphire. The trees were stamped with the Merry Christmas trees stamp set CL459 unto white paper and embossed with white embossing powder. Then I colored them with bundle sage distress ink and forest moss distress ink. Then I cut them out and mounted them with dimensional adhesive. The deer is called Young Deer D5234 and colored with copic markers. The snow was embossed with swiss dots embossing folder and I used light blue stickles on the edges of the torn paper.

Planner Closed
This is page one and two of the inside of the planner. The pockets measure 4.5" x 5" and there is a total of 4 pockets (receipts, cards sent, events and parties, gifts) On page one, I stamped the Hanging Christmas Ornaments stamp CG221 onto white cardstock (twice) with white ink and embossed with white embossing powder. Then I distressed it with broken china distress ink. On the second stamped image, I colored each orniment with individual distress inks and then cut each orniment out and paper pieced them to the panel. For page two I stamped the raindrop background stamp S5101 onto white cardstock with white ink and embossed with white embossing powder. The background of this panel was colored with a baby blue chalk ink. The stamp Joy F5246 was stamped onto white cardstock with Soft Pool ink and cut with a Spellbinder die.
pages 1 and 2


For page three I stamped the four framed snowflakes CG209 onto white cardstock with baby blue chalk ink and embossed with clear embossing powder. The word winter (Create Your Own CL368) was stamped onto white vellum and embossed with white embossing powder and then I glued it to the panels with glossy accents. On page four, I distressed the paper with bundled sage and forest moss distressing ink and then stamped the Classic Holly stamp CG229 using forest moss ink. I added red nailheads for the berries. The sentiment under the Holly comes from Holiday Sayings CL343.
Pages 3 and 4

Another view of all 4 panels open (inside--pages 1-4)


Planner opened flat


The background paper that is behind each panel is from Stampin Up. The back of the planner is also covered with Stampin Up Paper. To hold the planner closed, I attached ribbon and tied it into a bow. The total measurements (when opened flat) is 8.5" x 20". Each panel is scored at 4.5" and folds up accordion style.

This was a fun project to make and I the time went by very fast while I worked on this. Thanks for stopping by and I appreciate the comments. Hope that everyone has a wonderful week.

All stamps are from Hero Arts.